
In the last article we talked about OpenAPI, Swagger and Swashbuckle. And we created a document for ASP.NET Core Web API using these. From here you can read that article.
Add XML comments and annotations to your OpenAPI documentation.
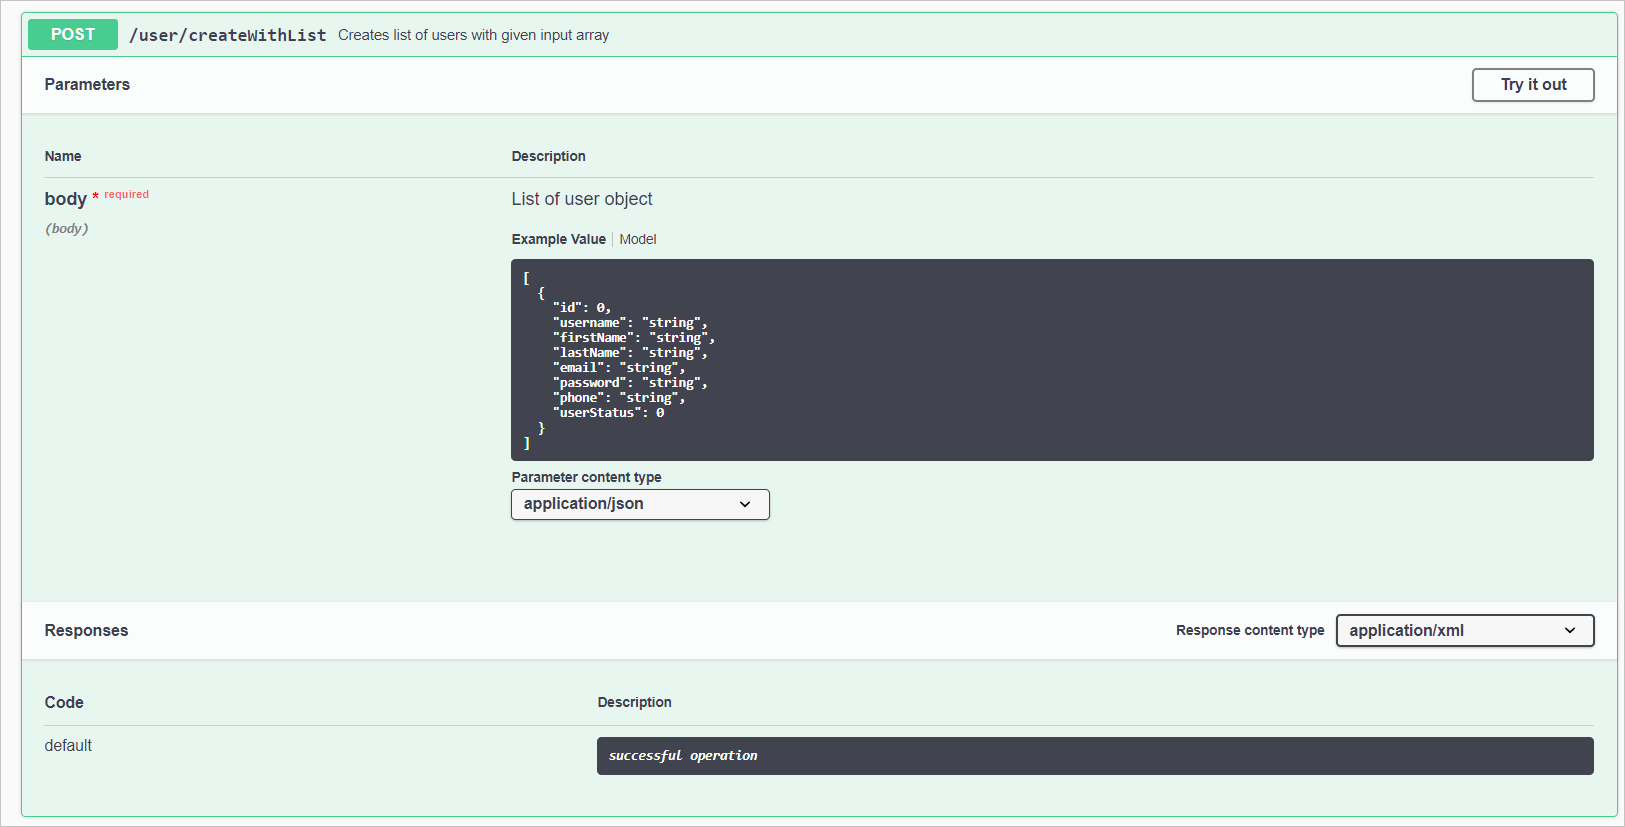
As you already know, the Swagger UI allows you to interact with and visualize the resources of an API without having to access the source code. The graphical representation of your API is generated automatically from your OpenAPI definition, making it easy for other developers to create apps that use it.
So here is how Swagger UI visualizes operations and methods clearly.

The Swagger UI also allows you to interact with any operation and even try it out.
We already have clear information about our APIs. What if you wanted to go a step further and give even more specific details? If it’s your first time using an API, you’ll want as much information as possible. Here is how you can do it easily.
XML comments
XML comments can be used to produce documentation for your code. These comments are usually placed directly before the code block that you’re commenting on.
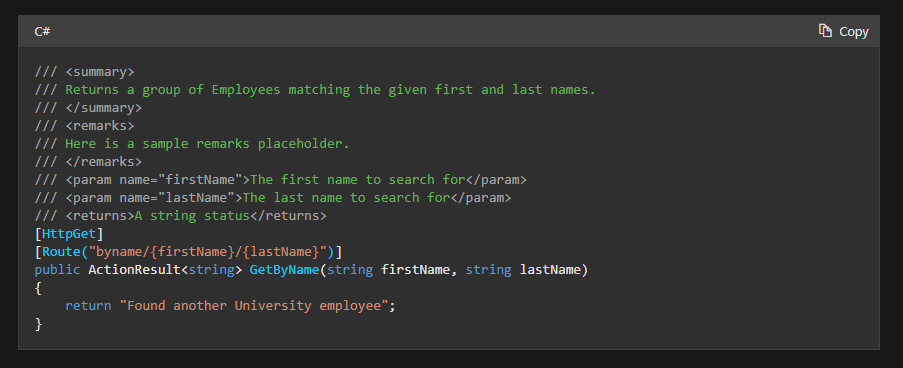
Here’s the XML nodes in use:
- summary: A high-level summary of what the method/class/field is or does.
- remarks: Additional detail about the method/class/field.
- param: A parameter to the method, and what it represents.
- returns: A description of what the method returns.
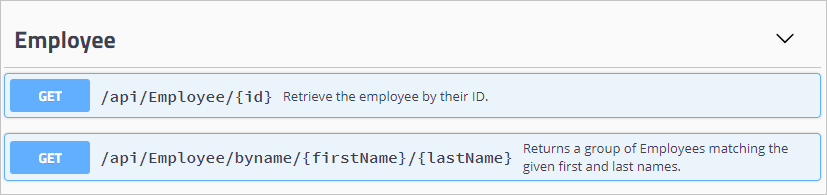
So, how will this be integrated into our documentation? Yes, the Swashbuckle tools will include your XML documentation comments in the OpenAPI documentation, which you can read in Swagger UI.
Data annotations
Yes, we can also add an annotation to our model, and Swagger will extend the API documentation to include it.
If we add this annotation to a controller:
[Produces( "application/json")]
We can see that added information in Swagger UI. Tadaa..
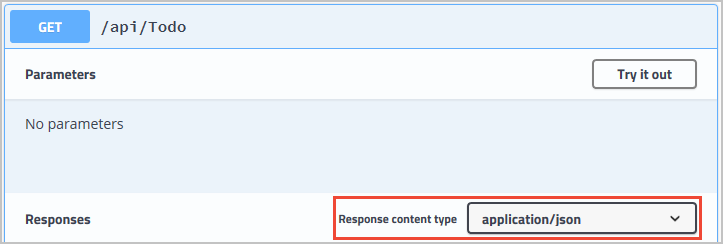
When defining our API, there are a few data annotations to consider.
- Determine which
content typesare handled by your API in requests and responses. The only content type your API should accept in both directions isapplication/json, as specified below.
[Produces("application/json")]
[Consumes("application/json")]- Determine the possible HTTP response codes that the calling client might receive. The following is an example of an API that can return a 404 Not Found error.
[ProducesResponseType(StatusCodes.Status404NotFound)]
- If your API generates a common set of response codes, instead of defining each one separately, you can use the following attribute to specify 200, 400, and 404. Find out more about how to use web API conventions here
[ApiConventionMethod(typeof(DefaultApiConventions))]- To improve the API consuming experience, including documentation, code creation, and integration with other services, emit an
operationId. By including theNameattribute in the HTTP verb filter, you may generate theoperationIdautomatically.
[HttpGet("{Height}/{Width}", Name="GetPrice"]
Exercise
Great.!.. Let’s do another exercise. In this exercise we are going to customize and extend our OpenAPI documentation with XML comments and annotations.
So before going to adding comments and annotations to our code, let’s see what we get from Swagger UI by default.
- Navigate to http://localhost/swagger in your browser to see the OpenAPI description of our API’s endpoint in Swagger UI. When you select the Get method, you should see something like this in the browser.
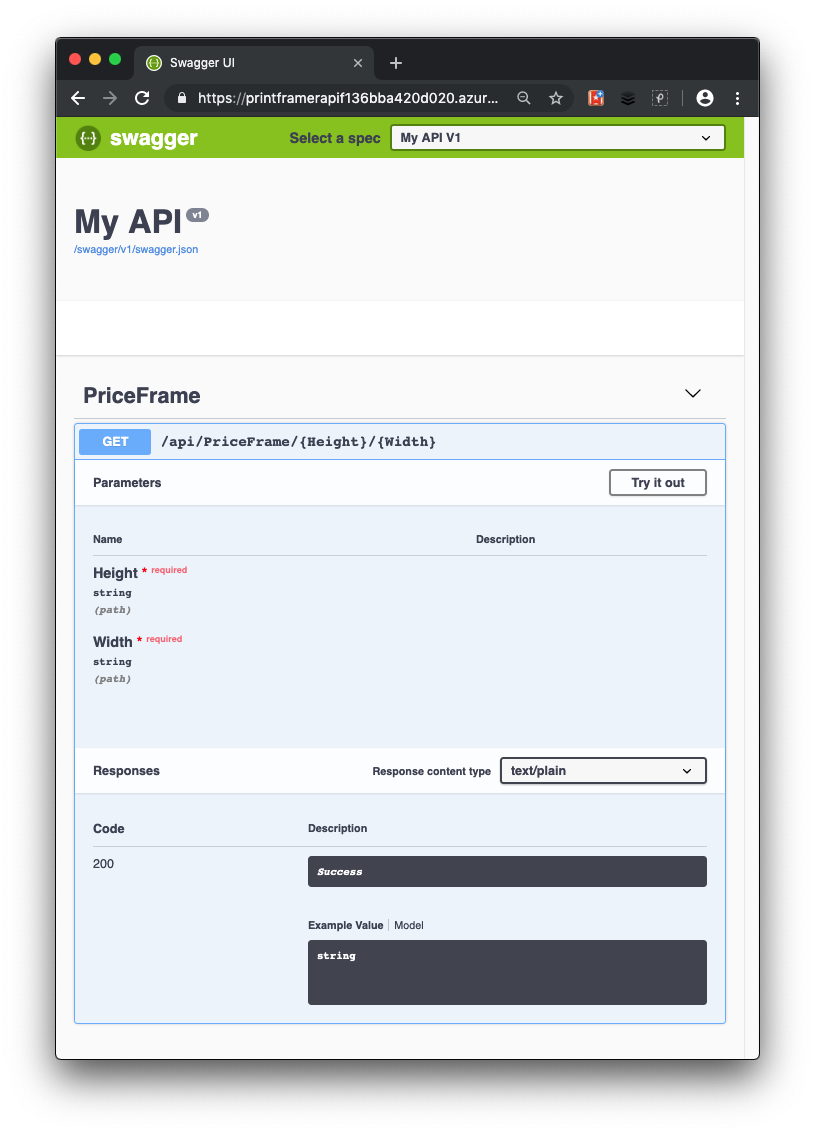
Swagger UI displays the available methods ( PriceFrame). As you can see, it’s an HTTP Get operation that requires two parameters: Height and Width. Select Try it out, enter values for Height and Width, and then select Execute to see the API call in action.
Add XML comments to the API
- Return to the Visual Studio Code instance you used for the last exercise.
- Update the PrintFramerAPI.csproj project file and add the
GenerateDocumentationFiletag to the existingPropertyGroup> and set it totrueto enable XML documentation in your project.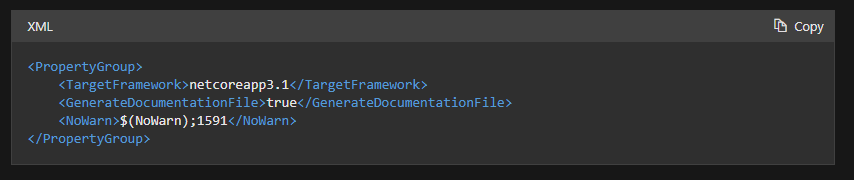
- Add the following using statements to Startup.cs.

- Update the call to
AddSwaggerGen()inConfigureServicesin Startup.cs to tell Swashbuckle to utilize XML documentation.
public void ConfigureServices(IServiceCollection services)
 {
     services.AddControllers();

     // Register the Swagger generator, defining 1 or more Swagger documents
     services.AddSwaggerGen(c =>
     {
         c.SwaggerDoc("v1", new OpenApiInfo
         {
             Version = "v1",
             Title = "PrintFramer API",
             Description = "Calculates the cost of a picture frame based on its
                            dimensions.",
             TermsOfService =
                      new Uri("https://go.microsoft.com/fwlink/?LinkID=206977"),
             Contact = new OpenApiContact
             {
                 Name = "Your name",
                 Email = string.Empty,
                 Url = new Uri("https://www.microsoft.com/learn")
             }
         });

         // Set the comments path for the Swagger JSON and UI.
         var xmlFile = $"{Assembly.GetExecutingAssembly().GetName().Name}.xml";
         var xmlPath = Path.Combine(AppContext.BaseDirectory, xmlFile);
         c.IncludeXmlComments(xmlPath);
     });
}- Add the following XML comment block above the HttpGet attribute of the
GetPricefunction in PriceFrameController.cs. When you add triple-slash comments to an action, the explanation is added to the section header, which improves the Swagger UI.
///Returns the price of a frame based on its dimensions.
///The height of the frame.
///The width of the frame.
///The price, in dollars, of the picture frame.
///The API returns 'not valid' if the total length of frame material needed
///(the perimeter of the frame) is less than 20 inches and greater than 1000
///inches.

[HttpGet("{Height}/{Width}")]
public string GetPrice(string Height, string Width)
{ string result;
result = CalculatePrice(Double.Parse(Height), Double.Parse(Width));
return $"The cost of a {Height}x{Width} frame is ${result}";
}- Run the following command in the Visual Studio Code terminal window to save all changes and ensure it builds locally.
dotnet build- To notice the changes, Locally launch the ASP.NET application. In Visual Studio Code’s terminal window, type the following.
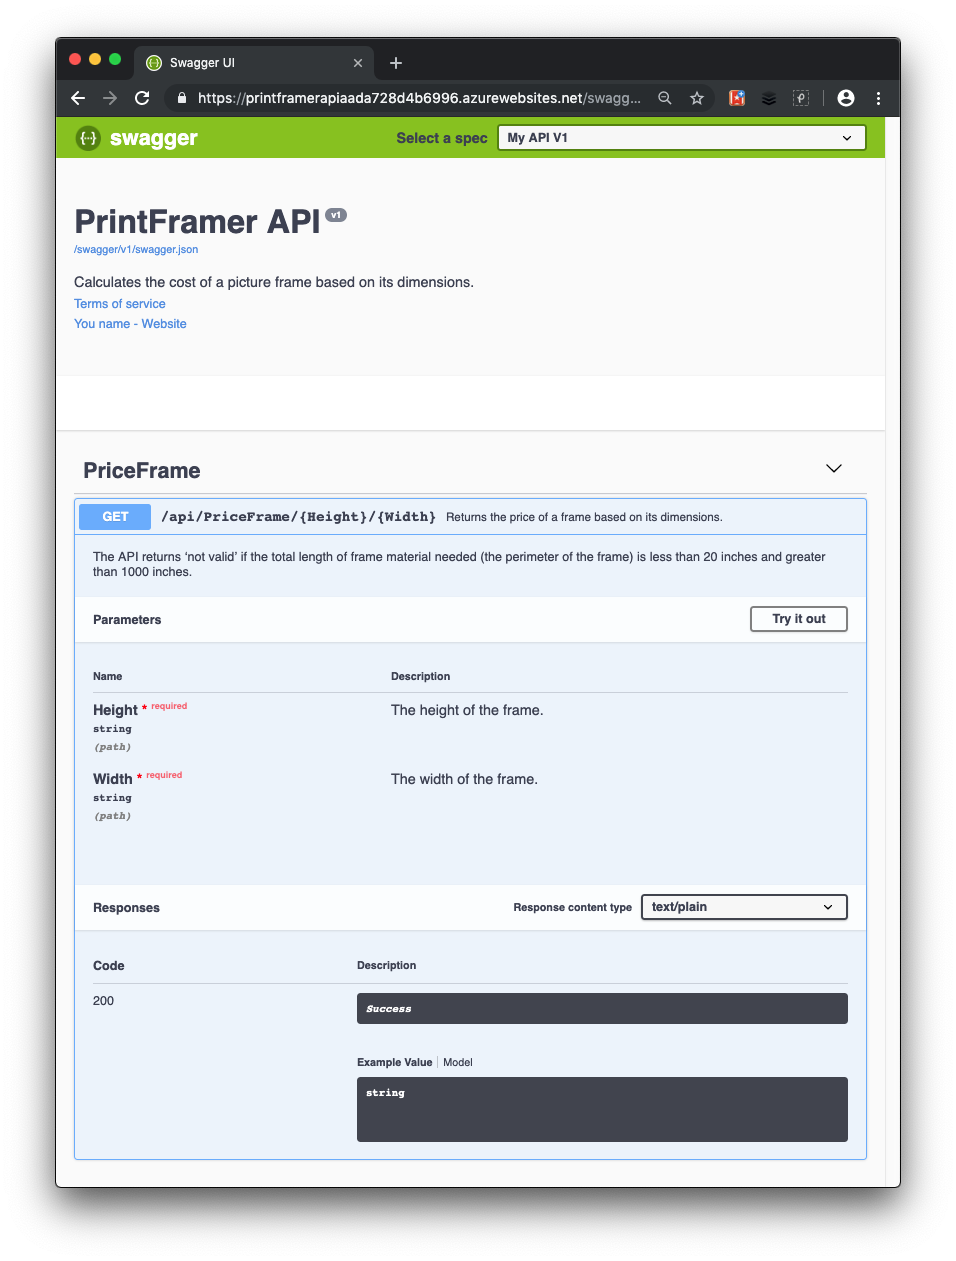
dotnet run- Check the Swagger UI at http://localhost:5000/swagger again, and note the additional information contributed to the OpenAPI documentation by your XML comments.
Add data annotations to the API
You can use attributes from the Microsoft.AspNetCore.Mvc namespace to enable Swagger to update the OpenAPI documentation.
- Add a
[Produces("text/plain")]attribute above theGetPricedefinition in the API controller, PriceFrameController.cs, to specify that yourGetPriceAPI supports a content type response fortext/plain.

Add Swashbuckle annotations to the API
The following XML comments and data annotations are a more reliable technique to inform developers about response types and problem codes. These variables will be used by Swashbuckle and the Swagger tooling to build a concise OpenAPI description of the expected HTTP response codes.
Also, add the Name property to the HTTP verb filter constructor. The OpenAPI operationId will be included in this.
Add Microsoft.AspNetCore.Http to the PriceFrameController.cs file.
In PriceFrameController.cs, replace GetPrice with the following code and comment.
///summary
///Returns the price of a frame based on its dimensions.
/// /summaryThe height of the frame.
///The width of the frame.
///The price, in dollars, of the picture frame.

///Sample request:

///Get /api/priceframe/5/10


///Returns the cost of the frame in dollars.
///If the amount of frame material needed is less than
///20 inches or greater than 1000 inches.

[HttpGet("{Height}/{Width}", Name=nameof(GetPrice))]
[Produces("text/plain")]
[ProducesResponseType(StatusCodes.Status200OK)]
[ProducesResponseType(StatusCodes.Status400BadRequest)]
public ActionResult GetPrice(string Height, string Width)
{
    string result;
    result = CalculatePrice(Double.Parse(Height), Double.Parse(Width));
    if (result == "not valid")
    {
        return BadRequest(result);
    }
    else
    {
        return Ok($"The cost of a {Height}x{Width} frame is ${result}");
    }
}
The following modifications are made as a result of this code update:
- The function creates a BadRequest (400) and an Ok status using the BadRequest() and Ok() methods, respectively, and passes the string result to the response.
- Each status code that can be returned from this method is described in the XML comments.
- The Name attribute of the HttpGet is used to emit the OpenAPI operationId parameter.
- The ProducesResponseTypeAttribute lists the various responses that the action can return. These properties are used in conjunction with XML comments, as previously explained, to provide human-friendly summaries for each Swagger answer.
With the following command, rebuild and run the web API:
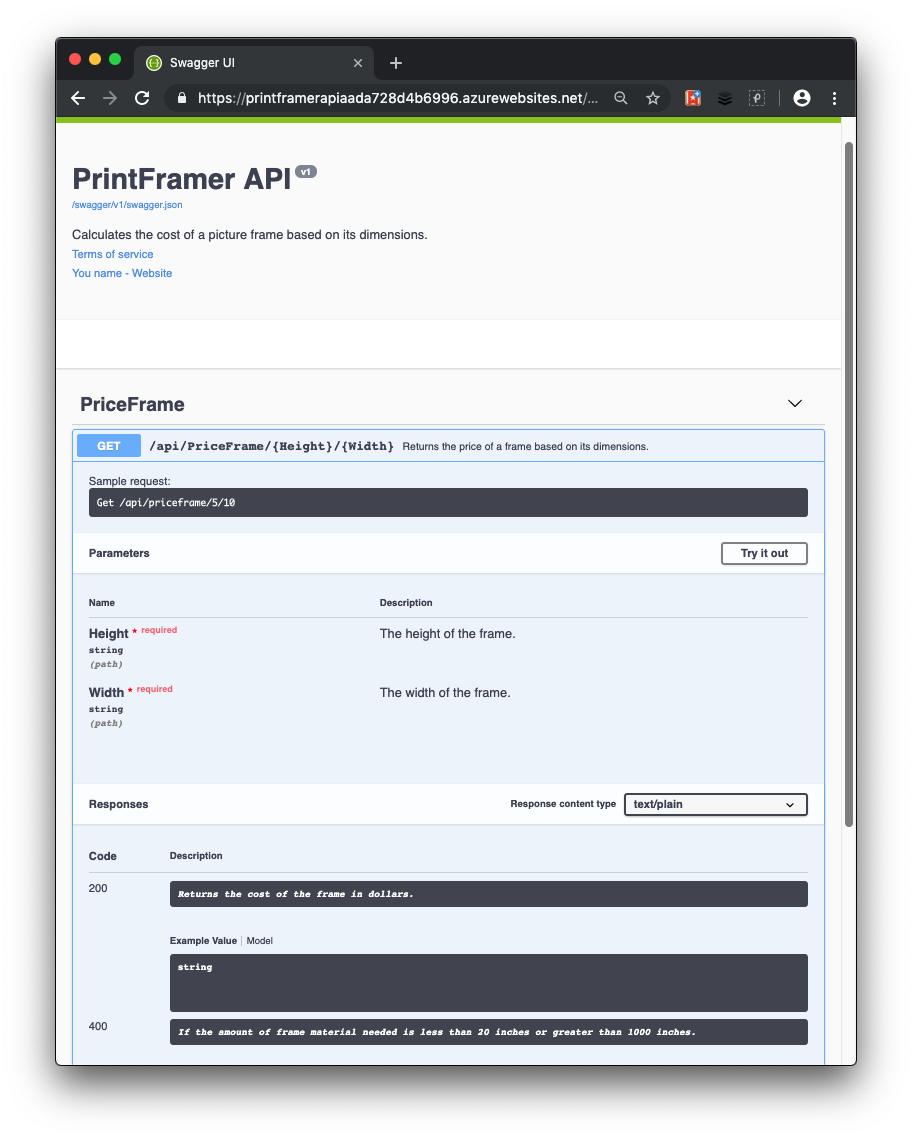
dotnet buildCheck the Swagger UI at http://localhost:5000/swagger once more, and note the additional information offered by these annotations. In the screenshot below, you can see the finished Swagger UI for your API.
Congratulations !! You improved the information a developer receives about our API in this exercise, making it much easier to use.
An API with full information is more consumable and easier to maintain. We used Swashbuckle and Swagger to autogenerate OpenAPI documentation for our ASP.NET Core API in this example.
Swashbuckle packages bring excellent OpenAPI documentation to our project. Swagger UI makes OpenAPI documentation simple to read and doesn’t require the consumer to be familiar with the API’s source code.
Next we learned how to improve the default documentation using XML comments and annotations.
So after two long articles we hope you have a good understanding about how you can easily create documentation for ASP.NET Core Web API using OpenAPI, Swagger and Swashbuckle.


")


")
